
Table of Contents
- Start With a Plan: Measuring and Setting Your Budget
- Choosing Slip-Resistant Bathroom Floor Tiles for Wet Areas
- Porcelain vs Ceramic Bathroom Tiles: Which Suits Your Floor?
- Bathroom Tile Sizes and Patterns: Getting the Proportions Right
- How to Choose Grout Colour for Floor Tiles
- Tile Finishes, Colour and Perceived Space
- Installation, Substrate Preparation and Maintenance
- Frequently Asked Questions
Last Updated: October 6, 2026
Start With a Plan: Measuring and Setting Your Budget
Choosing bathroom floor tiles starts with two numbers: floor area and total spend. Get these right and every later decision becomes easier.
How to Measure Your Bathroom Floor Accurately
Measure length and width at the widest points and multiply. For an L-shaped or alcove bathroom, split the space into rectangles and add the areas.
Add 10% for cuts and breakages. For a diagonal or herringbone layout, add 15%.
- Measure at floor level, not against the skirting
- Check for door swing and vanity clearance
- Note any recesses or pipework boxing
Budgeting for Tiles, Adhesive, Grout and Installation
The tile price is only part of the total. Adhesive, grout, levelling compound, waterproofing membrane and labour all add up.
Tiling a wet area often costs more than the tiles themselves, so don’t treat installation as an afterthought.
Skipping waterproofing in a wet area to save money is a false economy. Water damage behind tiles can mean a full strip-out and redo, which costs far more than doing it properly the first time.
Choosing Slip-Resistant Bathroom Floor Tiles for Wet Areas
Slip resistance is the most important safety decision for a bathroom floor. Tiles that look perfect in a showroom can become treacherous once wet, so style takes a back seat to evidence.
Understanding Slip-Resistance Ratings
In Australia, slip resistance is classified under the wet pendulum test and the oil-wet inclining platform test, producing a P0 to P5 rating where higher numbers mean better grip.
- P0 to P2: Not suitable for wet bathroom floors
- P3: Suitable for most bathroom floors
- P4 to P5: Better for ramps, commercial wet areas or households needing extra grip
The Australian Standard for slip resistance testing sets out how these ratings are measured. Ask for the rating before you buy, not after.
How the Rating Is Actually Measured
The wet pendulum test drags a spring-loaded rubber slider across a wet tile and converts friction into a P classification.
For a bathroom, the wet pendulum result matters more because soapy water, not oil, is the realistic contaminant. Ask the supplier for that classification specifically.
Matching the Rating to the Zone
A bathroom has zones with different exposure, and the rating should follow the zone:
- Dry zones (behind the door, under a freestanding vanity): P3 is usually adequate.
- General bathroom floor: P3 is the common minimum, but P4 gives a useful safety margin in households with children or older adults.
- Shower floor and immediate surround: P4 or P5 is the safer choice. This is the zone with the most standing water and the highest barefoot slip risk.
One tile across the whole floor is simpler but means paying for grip you don’t need in the dry zone. A P4 or P5 tile in the shower with P3 elsewhere saves money but adds a transition line needing careful detailing.
Finish, Texture and the Limits of the Rating
Slip resistance isn’t only about the P number, finish and texture matter just as much:
- Matte and textured finishes generally offer better grip than polished or glossy surfaces, even at the same P rating.
- Polished porcelain can be rated P3 when wet but still feel slick underfoot because the surface has no mechanical texture to bite into.
- Honed natural stone such as limestone or travertine often has good natural texture, but it needs sealing and its grip can change as the sealer wears.
Cleaning Products and the Rating Over Time
A tile doesn’t keep its rating forever. Residue from soap, shampoo, conditioner and some cleaners builds up and reduces friction, a floor that felt safe when new can become noticeably slicker after a year of film-leaving detergent.
- Use a pH-neutral cleaner for routine mopping.
- Avoid wax-based or oil-based cleaners on bathroom floors.
- Rinse the floor after cleaning rather than letting detergent dry on the surface.
Household-Specific Safety
A P rating is a baseline, not a guarantee. The people using the bathroom change what is safe:
- Young children have less balance and tend to run. P4 or higher across the whole floor is a reasonable precaution.
- Older adults are more vulnerable to falls and to the consequences of a fall. P4 or P5, plus a shower that can be used seated, is worth considering.
- Mobility aids such as walking frames and shower stools need a floor that grips the aid as well as the foot. Very smooth large-format tiles can be problematic here.
Transitions and Thresholds
Slip risk isn’t only on the tile. The transition from bathroom tile to adjacent flooring, carpet, timber, vinyl, is a common trip point. A gradual transition strip or ramped threshold is safer than a sharp step, especially for older users. If the bathroom floor sits lower for the drain fall, that step must be visible and, where possible, ramped.
A high P rating does not cancel out a poor fall to the drain, a slick cleaning residue or a sharp threshold. Slip safety is the combination of tile rating, surface texture, drainage, cleaning regime and transitions, not a single number on a box.
For a family with young kids or older relatives, choose P4 or higher with a textured finish. It costs little more and adds real safety.
Porcelain vs Ceramic Bathroom Tiles: Which Suits Your Floor?
Porcelain wins on bathroom floors for most households: denser, less water absorption and better with heavy foot traffic than ceramic.
Ceramic still has a place, lighter, easier to cut and often cheaper, suiting wall tiles or low-traffic floors.
| Feature | Porcelain | Ceramic |
|---|---|---|
| Water absorption | Very low | Higher |
| Durability | High traffic | Light traffic |
| Price | Higher | Lower |
| Best for | Bathroom floors | Walls, low-traffic floors |
Porcelain is harder to cut, so installation can cost a little more, but for a wet area that lasts decades, that trade-off usually pays off.
Bathroom Tile Sizes and Patterns: Getting the Proportions Right
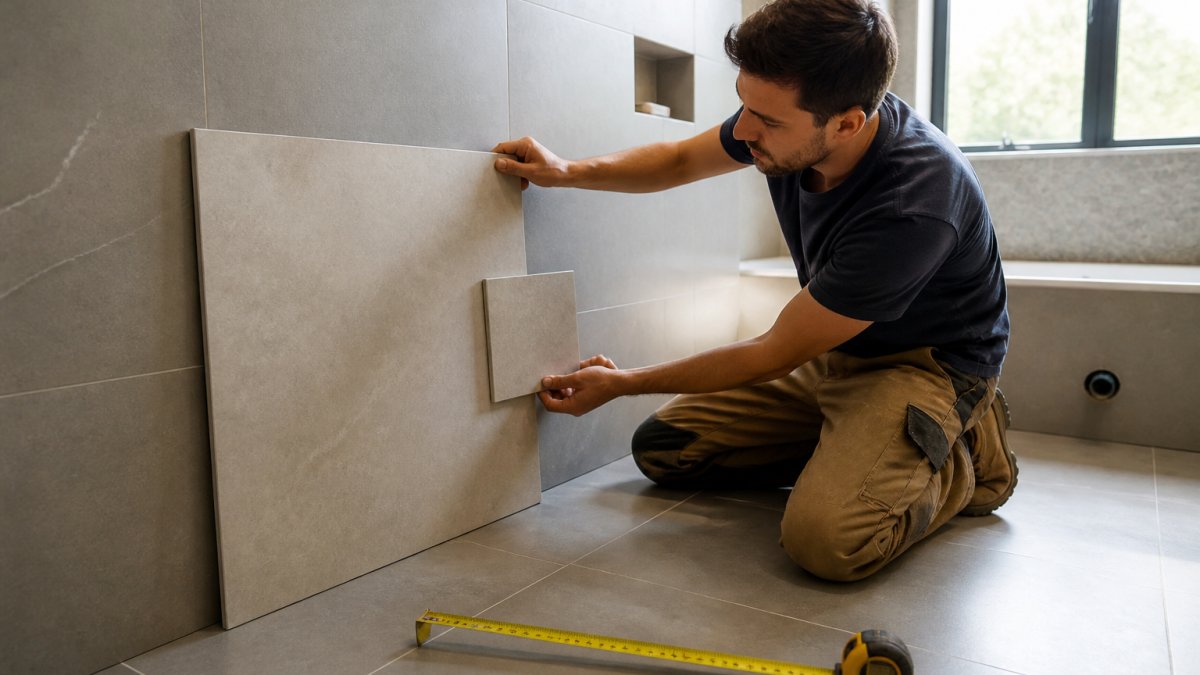
Tile size changes how big a bathroom feels. Large-format tiles mean fewer grout lines, making a small room look bigger; medium and small tiles suit period homes and patterned layouts.
Large-Format vs Medium and Small Tiles
- Large-format (600mm+): Fewer grout lines, modern look, needs a very flat floor
- Medium (300-500mm): Versatile, easy to lay, forgiving of uneven floors
- Small or mosaic: Great grip in showers, more grout to clean
Large-format tiles demand a level substrate. If your floor isn’t flat, expect extra prep work or choose a smaller size.
How to Choose Grout Colour for Floor Tiles
Grout colour is both design and practical: a close match hides dirt and looks seamless, while contrasting grout turns the layout into a feature.
- Matching grout: Hides marks, suits busy households
- Contrasting grout: Highlights pattern, needs more cleaning
- Epoxy grout: Resists staining, costs more upfront
Grout Width and Its Effect on the Look
Narrow grout lines (2-3mm) suit rectified tiles and a sleek finish. Wider lines (5mm+) work with rustic or patterned tiles and forgive slight size differences.
Rectified edges are cut square, so they sit closer together. Pressed-edge tiles have a slight bevel and need a wider joint.
Tile Finishes, Colour and Perceived Space
Finish and colour decide how the room feels.
Light colours open up a tight space. Dark tiles add drama but can shrink a small room, especially with little natural light.
Think about the whole palette before you commit. Floor, walls, vanity and fixtures all read together.
Installation, Substrate Preparation and Maintenance
A perfect tile on a poor substrate will fail. The floor must be clean, dry, structurally sound, level to tolerance and, in wet areas, waterproofed before a single tile goes down, the part most guides skip, and where money is saved or lost.
Floor Flatness and Why It Matters
Manufacturers and installers work to a flatness tolerance, usually a maximum deviation over a set length. Large-format tiles are far less forgiving: a 600mm or 900mm tile will rock or lippage over a floor a 300mm tile would sit on happily. If the floor is out of tolerance:
- Self-levelling compound to bring the floor back to tolerance.
- Grinding or planing high spots, which is dusty and slow.
- Choosing a smaller tile that can follow the floor’s contours more easily.
Homeowners often buy large-format tiles for the look, then discover the substrate needs several hundred dollars of levelling. Check the floor before committing to a tile size.
Waterproofing in Wet Areas
In Australia, wet-area waterproofing is governed by the relevant Australian Standard and the National Construction Code. A bathroom floor is a wet area, and the membrane must be applied before tiling. Key points:
- The membrane must be continuous, including up the walls to the required height and into corners and penetrations.
- A fall to the drain must be built into the substrate or the screed, not created by tile adhesive.
- Waterproofing must be allowed to cure fully before tiling begins.
Drainage Falls
A bathroom floor needs a fall to the drain so water doesn’t pool, typically 1:80 or 1:100, built into the screed or substrate, not the tile adhesive. Too little fall lets water sit, accelerating grout deterioration and creating a slip hazard; too much feels noticeably sloped underfoot.
Tile Thickness and Substrate Compatibility
Tile thickness affects both strength and installation height:
- Thin tiles (around 6-8mm) are common for wall use and can be used on floors with a suitable substrate, but they are less forgiving of movement.
- Standard floor tiles (around 9-12mm) are the usual choice for bathroom floors.
- Thick tiles (12mm+) are heavier and may need a stronger substrate or a different adhesive.
The substrate must carry the weight of tile, adhesive, grout and any screed. On timber, that often means a cement sheet or decoupling membrane; on a concrete slab, check for cracks, curing and moisture.
When to Call a Professional
Some bathroom tiling is within reach of a confident DIYer. Some is not. A professional is advisable when:
- The floor is out of flatness tolerance and needs levelling.
- Waterproofing is required and you do not hold the relevant certification.
- The layout involves large-format tiles, herringbone or diagonal patterns.
Sealing, Cleaning and Lifecycle Costs
Porcelain and glazed ceramic rarely need sealing; natural stone such as marble, limestone or travertine does, and needs resealing over time. Ongoing care affects total cost of ownership:
-
Porcelain: Dense, low absorption, easy to clean with a pH-neutral cleaner. Minimal ongoing cost.
-
Glazed ceramic: Easy to clean, but the glaze can chip and the body is more absorbent if exposed. Low ongoing cost.
-
Natural stone: Needs sealing on installation and periodic resealing, typically every 12 to 24 months depending on the stone and the sealer. Requires pH-neutral cleaners and prompt cleanup of acidic spills such as vinegar or citrus. Higher ongoing cost.
-
Use a pH-neutral cleaner for everyday cleaning.
-
Avoid abrasive pads that dull the surface.
-
Reseal natural stone as directed by the manufacturer.
A cheap tile needing constant care can cost more over ten years than a durable one.
Grout and Adhesive Choices That Affect Longevity
Grout and adhesive are not interchangeable:
- Cement-based grout is the default and is fine for most bathrooms, but it is porous and can stain.
- Epoxy grout resists staining and water better, but costs more and is harder to install.
- Flexible adhesive is needed where there is movement, such as on timber substrates or over underfloor heating.
Using the wrong adhesive or grout for the substrate and tile type is a common cause of failure, often not obvious until the floor moves or grout cracks.
Buy your grout, adhesive and a spare box of tiles at the same time as the tiles. Dye lots vary between batches, and a later match for repairs is often impossible.
The installation and maintenance decisions, flatness, waterproofing, falls, adhesive, grout and sealing, determine whether the floor lasts five years or twenty. Choose the tile for looks, but choose the installation and care regime for longevity.
Frequently Asked Questions
What factors should I consider when choosing bathroom floor tiles?
Focus on slip resistance first, because bathroom floors get wet. Then weigh water absorption, durability and tile size against your room dimensions. Porcelain suits busy floors and wet areas; ceramic costs less but needs more care. Finish matters too: matte surfaces hide water marks and offer better grip than glossy tiles. Finally, check grout colour and width, as these affect both looks and cleaning effort.
Which tile material is best for a bathroom floor?
Porcelain is the strongest all-round choice for bathroom floor tiles. It has very low water absorption, handles heavy foot traffic and stands up to repeated cleaning. Ceramic works well in low-traffic bathrooms or on walls, but it is softer and more porous. Natural stone such as marble or travertine looks striking but needs sealing and more maintenance. For most households, a slip-resistant porcelain tile gives the best balance of performance and value.
What tile finish is safest for a wet bathroom floor?
Matte and textured finishes are safest. They provide more grip than polished or glossy surfaces, which become slippery when wet. Look for tiles rated for wet areas and check the slip-resistance rating, which measures friction under wet conditions. Smaller tiles with more grout lines also add grip because grout provides extra texture underfoot. If you want a polished look, keep it on walls and choose a matte or slip-resistant tile for the floor.
Are large-format tiles suitable for small bathrooms?
Yes, with planning. Large-format tiles reduce grout lines, which can make a small bathroom feel bigger and are easier to clean. However, they need a very flat substrate and often require cutting around drains and fixtures, which increases waste and installation cost. In tight spaces, a medium-sized tile or a large tile with a simple grid layout often works better than an intricate pattern that draws attention to the room’s limited dimensions.